 |
|
 |
| |
 Hollow Handle Tutorial Hollow Handle Tutorial
We have had more Questions about "how do you build your hollow handles?" than any other knife we make, so i thought i would give you guys a step by step with pics.
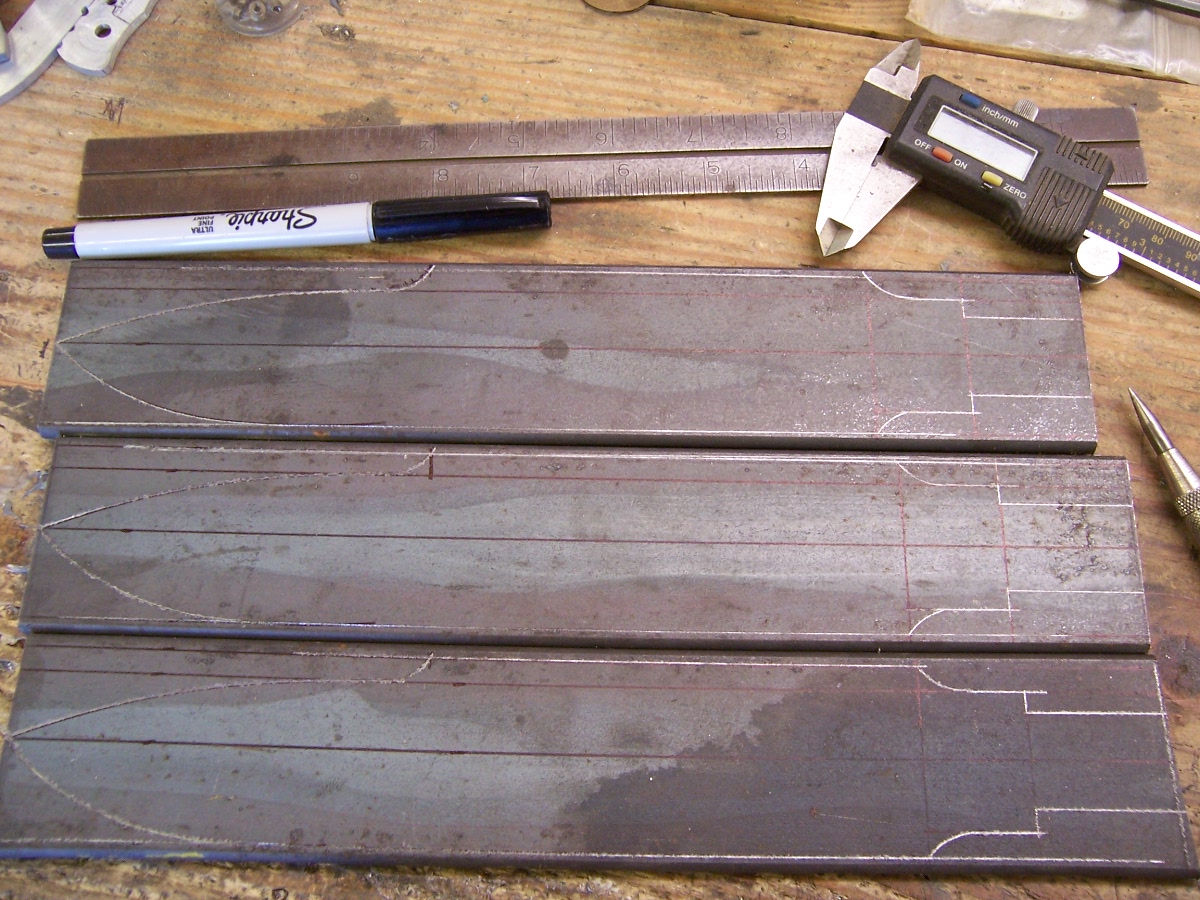
first i make knives by the stock removal process. i draw out my design, mill any slots or grooves on the bar stock if the design requires it(easier to hold in the vise), drill any holes and cut out the guard stop with a band saw, then mill it true. at this point i check the fit of the guard. i do not cut out the blade yet. i need the blade area to be square for more milling.

 step 2 step 2
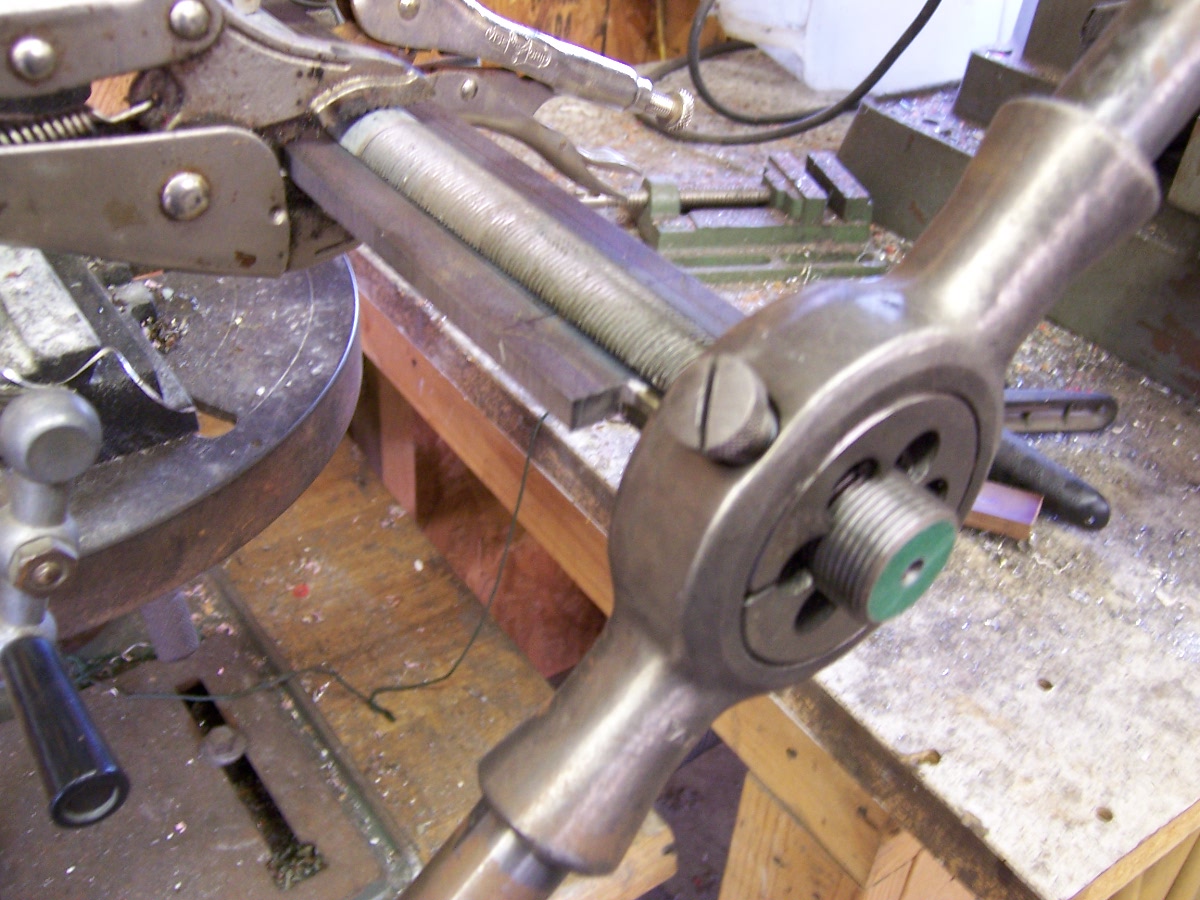
after the guard stop is true and the milling on the sides of the blank are complete. i then prep the tang for tapping. i have made my own tang tapping fixture since i do not have any CNC equipment, i had to figure out how to do this by hand. i line my bar blank up in the fixture with the lines i have drawn on the bar to line up the tang straight, and clamp it down. then i turn the Die until it meets the tang and put some cutting fluid on it, and continue turning. After i turn it the desired length, i remove the bar and wash out the cutting fluid and any grit left behind. then i check my threads with the handle that will go to this knife. i also make sure the guard and handle are true and seat correctly on the blank.
 Step 3 Step 3
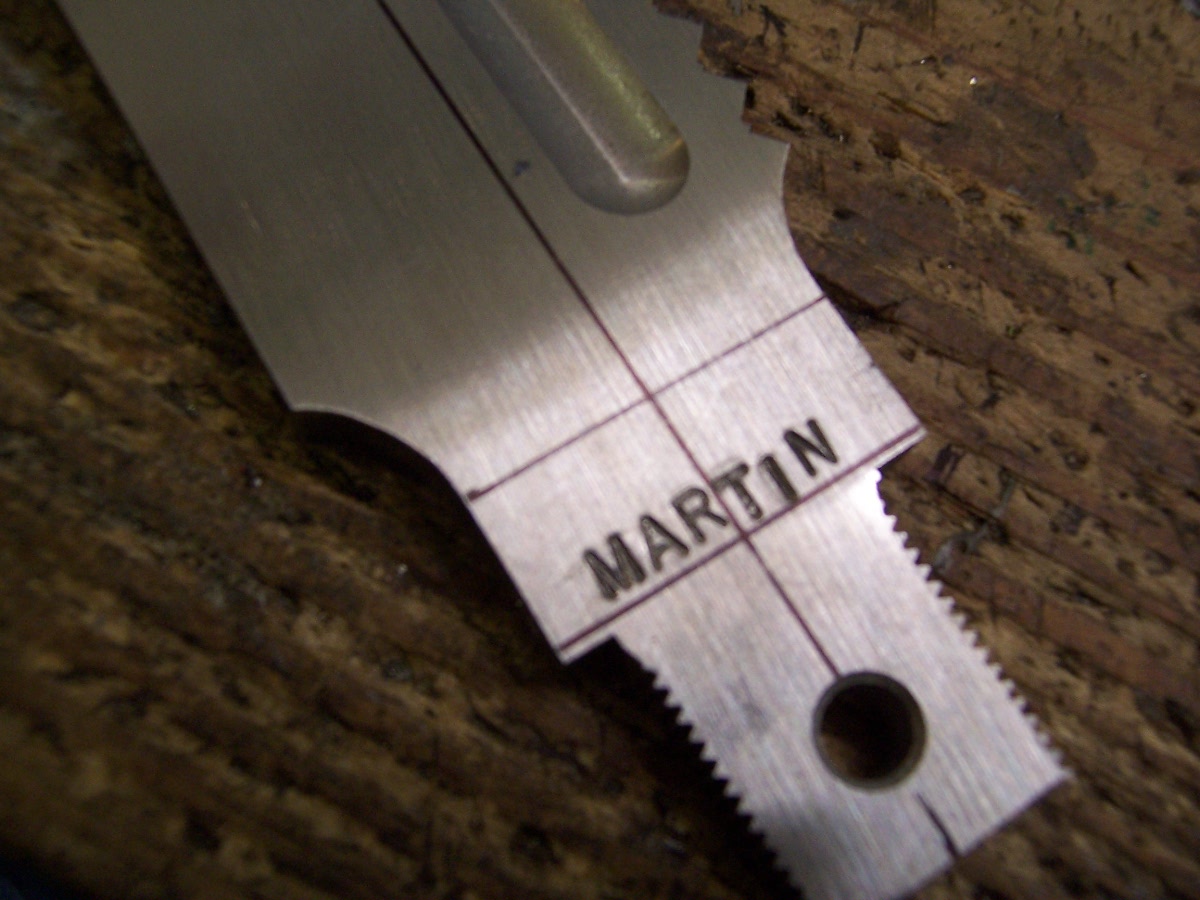
Now i put the saw teeth on the hollow handle. i use two types of saw teeth. split saw teeth and offset saw teeth. what ever style the process is similar, i use my mill to cut them into the blank. after the teeth are on the blank i cut the blade shape out of the blank.
 Step 4 Step 4
now i stamp the blank and start grinding. when the blank has been ground, i get it ready to heat treat by washing it in soapy water to get rid on all grease and foreign material. then if it is Stainless i wrap it in paper towels to create a carbon barrier, then it is wrapped in stainless foil to keep the oxygen out. our heat treat process is determined by the type of steel we use. but they all go through the initial critical temp followed by the cool down to room temp, them tempered for 2 hours, followed by a cryo cycle for 12 hours, then a second 2 hour temper followed by another 12 hour cryo, and finally one last 2 hour temper.
 Step 5 Step 5
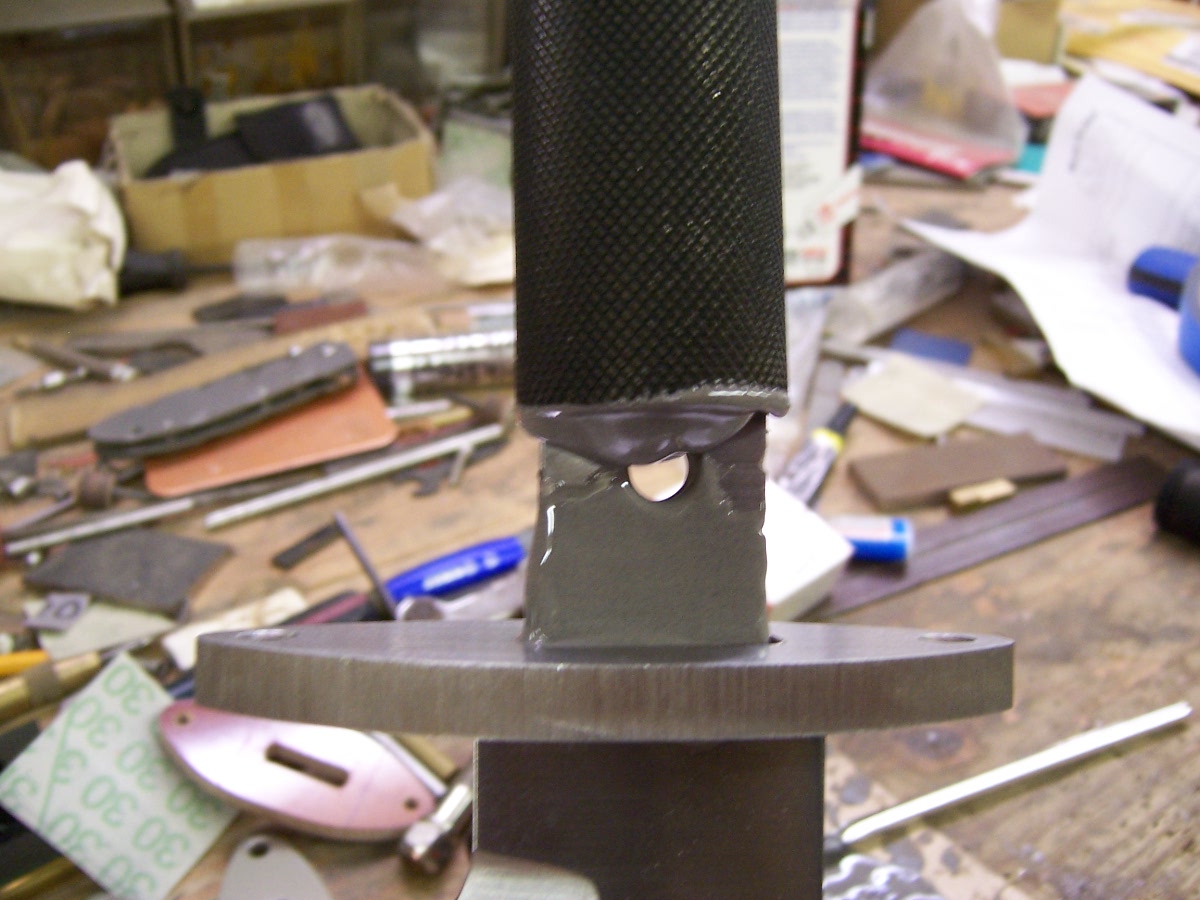
Clean up and Assembly is next. i clean any scale or discoloration on the grinder until the blade is at the fine satin finish. i epoxy up the guard and handle and attach them to the blade. after the epoxy starts to set a little i scrape off the excess epoxy and wipe off the remaining epoxy residue with acetone, and allow it to harden for 5 hours. After the epoxy hardens i do a final clean up on the guard and blade, and put the final finish on the knife.
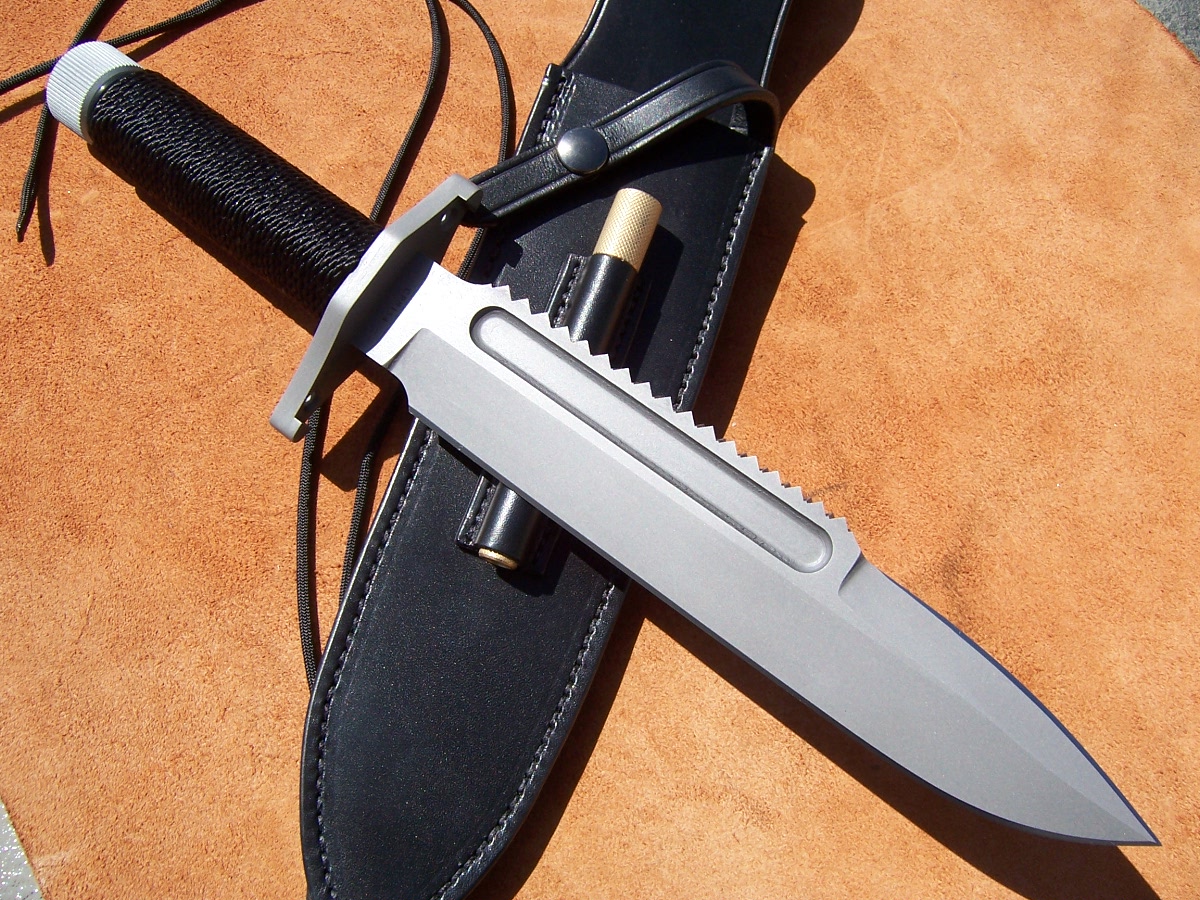
 Final
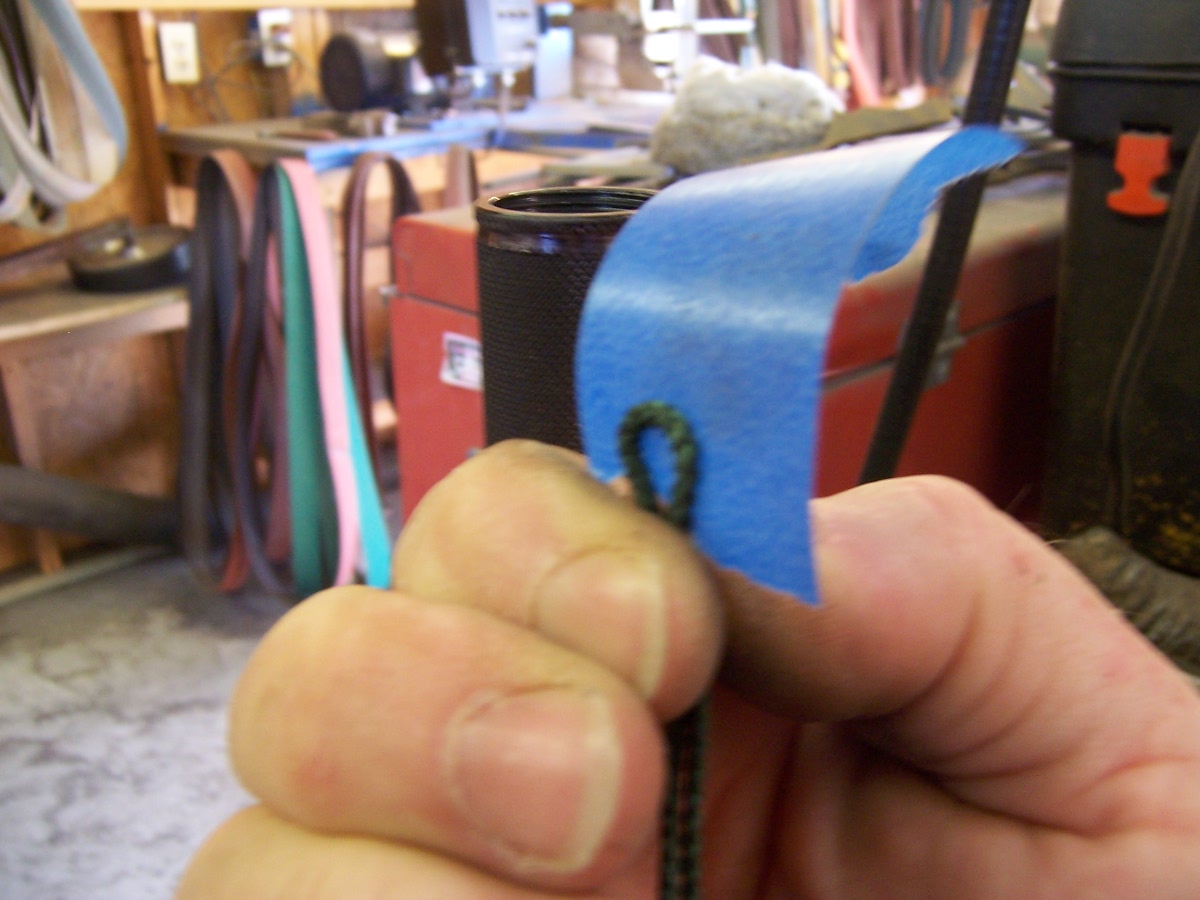
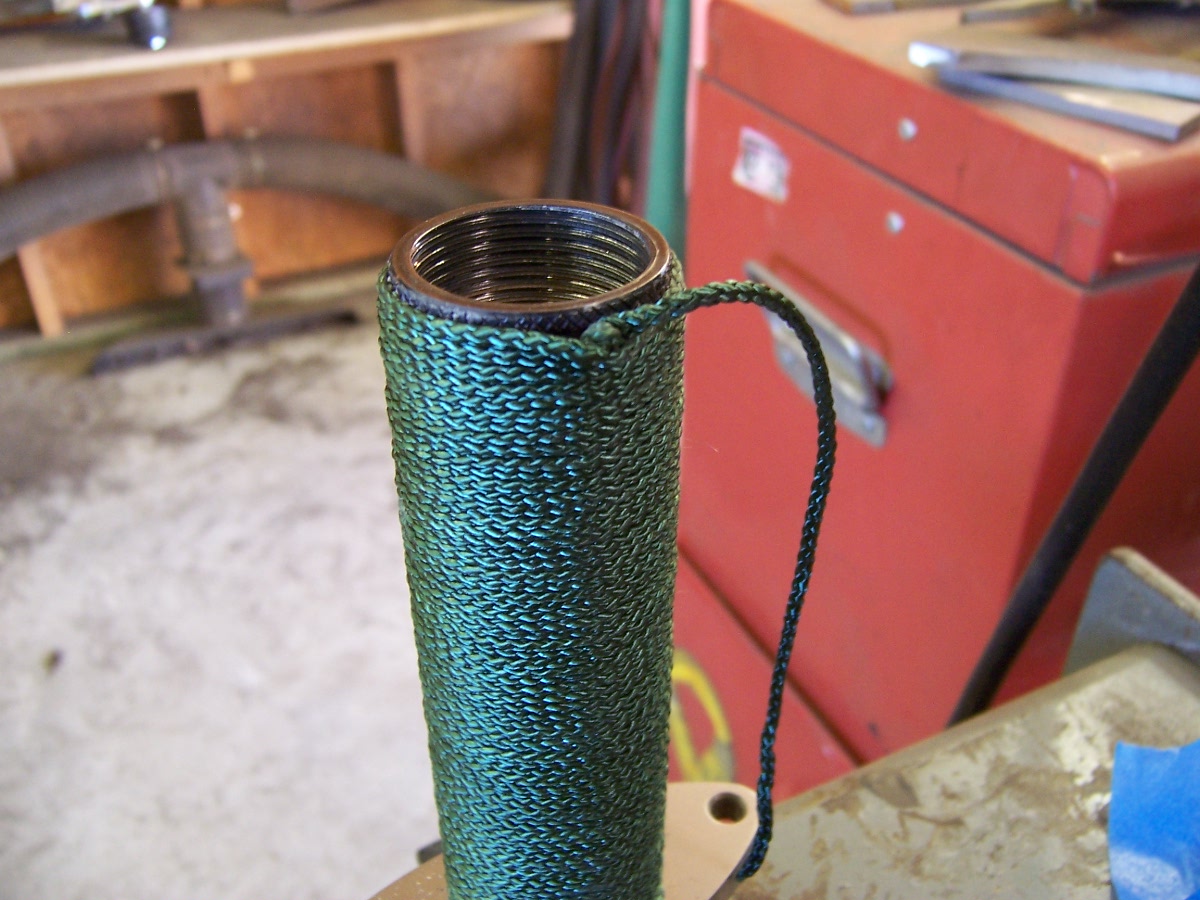
Cord Wrap and Sharpening Final
Cord Wrap and Sharpening
its hard to explain how i wrap the handle, so i will just post the pics. maybe later on i will do a video and post it in our blog and Facebook. enjoy the pics and thank you for taking the time to read the tutorial.---newt
| Integrals | Tactical | Hollow Handle Survival |
| MEMORIAL PAGES | BLOG | CUSTOMER COMMENTS / PICTURES | VIDEOS (Shop, Shows, Tutorials, etc.) | Contact Us | Shipping Information | Our Troops |
| Return Home | KNIFE GALLERY | INVENTORY | CONSIGNMENT | VARIOUS INFO | Subscribe To Email List |
|
|
 |
|
 |


;void(0))
;void(0))
;void(0))
;void(0))
;void(0))
;void(0))
;void(0))
;void(0))
;void(0))
;void(0))
;void(0))
;void(0))
;void(0))
;void(0))
;void(0))
;void(0))
;void(0))
;void(0))
;void(0))
;void(0))
;void(0))
;void(0))
;void(0))
;void(0))
;void(0))
;void(0))
;void(0))
;void(0))
;void(0))
;void(0))
;void(0))
;void(0))
;void(0))
;void(0))
;void(0))
;void(0))
;void(0))
;void(0))
;void(0))
;void(0))
;void(0))
;void(0))
;void(0))
;void(0))
;void(0))
;void(0))
;void(0))